
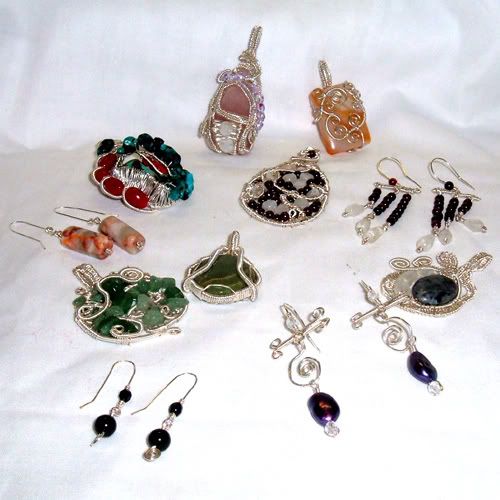
Here is a picture of the jewelry before oxidation.
In the directions given in the forum thread, you had to lay the jewelry in the bag and turn it over periodically so it would oxidize on both sides. Because of that you couldn't really do very much at one time. Also, it would be inevitable that you would get at least some egg on the jewelry. Well, I'm lazy. I don't want to have to turn it over, and I don't want to have to clean egg out of all the little bitty cracks and crevices in the wire. So I decided to make a rack to hang the jewelry on out of old electrical wire.
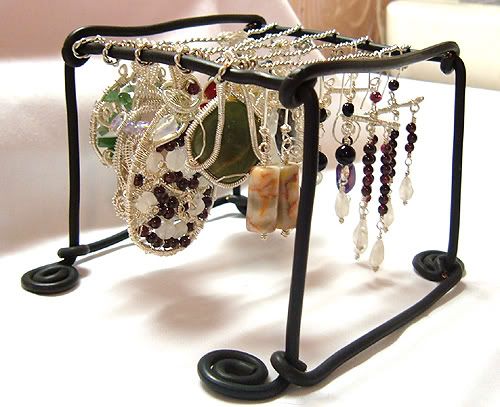
As I boiled the eggs I put the all the jewelry to be oxidized onto the rack. Of course, you need to make sure all items are well seperated.
Here is another image of the rack with the jewelry on it before going into the baggie.
Soooo..... into a gallon size baggie went three very hot, semi-runny hard boiled eggs. It was kinda fun smushing them with the shells on :). Then I just popped the whole rack into the back and sealed it up real quick.
Here's a picture of the whole icky mess here (if you're into that sort of thing).

After the eggs had completely cooled, I took the jewelry out and microwaved the eggs and put the jewlery back in again.
Here's what the jewelry looked like after the second time in there.

As you can see, it's already doing pretty well.
I repeated this 2 more times.
This is what the jewelry looked like after the last time in the bag.
After giving it all a real good rinse, I cleaned a few of the pieces with a paste made from vinegar and baking soda, leaving the tarnish inside the crevices to show detail.
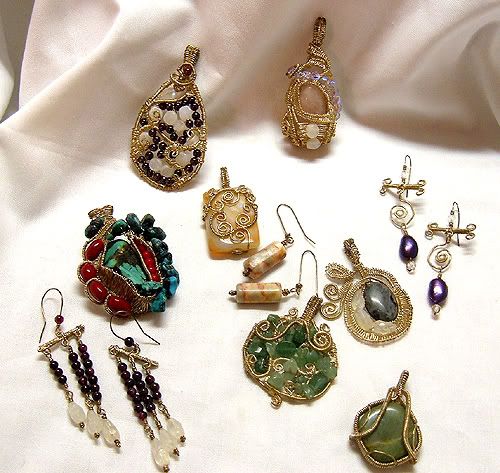
This is the finished jewelry.

I probably could've achieved better results by letting it sit overnight, but I wanted to hurry up and get this blog posted. Also, the person who originally suggested this method said she uses fine grade steel wool to rough up the pieces just a little bit between the times the jewelry is in the bag with the eggs. That would have improved the finished look as well. Next time, I'll have to try that.
The rack I used was made to fit inside a large baggie. If you needed to tarnish larger pieces or necklaces, you could probably find a plastic shoebox (with a really good seal) or some other container and make a rack to fit it.
If anyone else has suggestions on improving this I would love to hear them!