I just wanted to take a moment to tell you all that since I have received such a great response to my half off sale this month I am going to continue offering everything on my shop at 50% off until New Year's Day. Details of the sale can be found in my shop announcement on etsy, http://gailavira.etsy.com. Next month I will be having awesome sales in my tutorial shop to start off 2009.
I have received several wonderful thank you notes from my customers who have taken advantage of this sale. I wanted to give everyone a Christmas present this year because things have been so bad in 2008. I couldn't afford to give it all away for free, so half off is the best I can do. I'm so glad that so many of you appreciate it. Thank you all for being such wonderful customers.
Hope everyone had a wonderful holiday this year. I wish everyone a spectacular New Year too!

Saturday, December 27, 2008
Tuesday, December 16, 2008
I Say it Should be an Official Olympic Sport!
I try to stay away from political topics on my blog. But this time, I just couldn't resist.
We all know about the "Shoe Incident" already, right? Well, it's all over the news, internet, newspapers, and everything else, so if you don't already know about it, you need to crawl out of the hole you've been living in.
Anyway, did you see how quickly the guy took off his shoes, and how accurate his aim was? With that in mind, I think they should seriously consider making shoe throwing an official Olympic sport.
And it shouldn't end right there. I also think G.W.B should be made available to each country, on a rotating basis, as the official Practice Dummy!
Friday, December 12, 2008
A New Shop, an Experiment and a Sale
Things have been so crazy lately I keep forgetting to post here on my blog. What is it about the holidays that does this to people? We take the one time of year that should be about relaxing and enjoying time with our families and turn it into a hurricane of obligations. We overextend ourselves to the point that we can't see any end in sight. Then add the media hype and all the TV holiday specials, the retail feeding frenzy, and who only knows what else, it's a miracle that anyone really wants to celebrate the holidays once they actually get here!
Oh well, I guess all we can do is sit back, take a deep breath, and try to remember what it was like to be a kid. Do you remember what that was like? When none of this other stuff bothered you? When the decorations went up in the stores in October and you walked through the isles in complete wonderment, anticipating the joys of Christmas morning. Not even caring that Halloween was just around the corner.
I think that is going to be my goal next year. To experience the holidays in all the glory possible when seen through a child's eyes.
As for this year, well, let's just see what happens.
Now, on to other subjects...
I've opened a new shop on Artfire.com. I don't have much in it yet because I am just getting a feel for the site and how it works. So far it seems like a pretty decent venue. Before I signed up I looked around the site and saw that they claim to be doing a lot of advertising in magazines and other places. If they really are doing as much as they say, then it should turn out to be a pretty good place to do business. Of course, I still have to do my own advertising, but that is true regardless of any site you sell on.
This part will be of interest more to other sellers then my customers, so skip this if you aren't looking for a place to sell what you are making.
Right now you can get their "Verified" membership for only $7 a month (it's usually $20). Also, if you refer 10 other members to the site who sign up as verified members, you get your shop for free, for life. They do also have a basic membership, but this offer only applies to people who sign up as verified members. Also, the referral offer is only good until December 31.
I do wish I had found out about the site before now, so I could give an accurate review, but I just signed up the other day. If you want to go try it out for yourself, here is the link that will automatically put me in as the referrer (hey, if I can get the shop for free, why not, right?).
http://www.artfire.com/modules.php?name=sevenforlife&afuid=6191
Ok, my little Artfire advertisement is over. Next....
I've never been a big fan of Tigereye, but lately I've seen a lot of red colored tigereye. I read that it turns red once it's been heated. Silly old me decided to try and turn it red in the oven. Last time I ran the self cleaning cycle on my oven I put a piece of tigereye a friend had given me in there and let it run for 3 hours. I didn't think the oven would get hot enough to change the color, but it did. It turned it from the normal golden brown tones typical of tigereye to a deep bloody brownish red. It looks kinda cool.

And, last but not least... a sale.
Well, more like a reminder of a sale. I'm still running my 50% theme of the week sale in my etsy shop. I'll be putting different items for sale each week until New Year's. This week is Pendants. Next week, well, I haven't made up my mind yet. Any suggestions?
Here's a link to my Etsy shop so you can go check it out. http://gailavira.etsy.com.
Have fun, and in case I don't get around to posting here again for a while, I hope you all have a great holiday!
Saturday, December 6, 2008
My Christmas Present to Me (a little bit early)
I love to use hand-cut stones in my jewelry designs. They add a much more personal touch to the finished piece, and ensure that it is truly one of a kind. Unfortunately, I don't have the skills required to cut the stones myself. Even if I did have the skills, I'm not quite certain I would trust someone as clumsy as myself around that kind of equipment. Which means that I don't get to use them that often. Once in a while, though, I have to treat myself to some of the beautiful cabs created by other artists.
I recently bought five gorgeous stones from another Etsy seller, GemCutter. I began watching his shop last spring after running across a Red Plume Agate cabochon in the supplies section on Etsy. I really wanted that cab, but for some reason kept putting off purchasing it. Then, before I knew it, it was gone. When Micheal re-opened his Etsy shop after the summer showing season was over I began watching again as all the gorgeous stones I wanted flew out of his shop before I had a chance to buy them.
Then I saw a piece of Laguna Agate I just had to have. Instead of waiting and debating with myself over whether I really needed it or not, I jumped on it. When it came in the mail I was so excited! The color of the stone was so much better than it was in the pictures. The shape was perfect. It even had a little bit of exposed Druzy crystals in the center, giving that spot an unexpected sheen.

Click on image to see more pictures of this necklace.
I wrapped this one with a simple netted bezel, so as not to cover too much of the stones personality. Then I combined it with Rose Quartz and Plum Aventurine to accent the colors in the stone. This necklace turned out so beautifully I decided I had to buy more cabs from Micheal.
My next purchase was Yellow Crazy Lace Agate. I've seen so many crazy lace agate beads that were dyed to add color to parts of the stone. Most of them leave something to be desired. So when I saw this one, with it's beautifully natural (yes, natural, not dyed) shades of yellow and cream, I knew exactly what to do with it.

Click on image to see more pictures of this necklace.
I set this one in a simple coiled basket weave bezel and hung it on a strand of Aragonite and tiny silver beads, with a handmade toggle clasp to match the bezel. It turned out so beautiful I'm almost hoping it doesn't sell. (I want it!)
I still have three more stones from GemCutter's shop. A wonderful purple Mexican Lace Agate, a gorgeous Mozarkite cab, and a stunning Porcelain Jasper teardrop shaped cab. I can't wait to get to work on those. I hope they turn out as well as the other two did. *s*
I recently bought five gorgeous stones from another Etsy seller, GemCutter. I began watching his shop last spring after running across a Red Plume Agate cabochon in the supplies section on Etsy. I really wanted that cab, but for some reason kept putting off purchasing it. Then, before I knew it, it was gone. When Micheal re-opened his Etsy shop after the summer showing season was over I began watching again as all the gorgeous stones I wanted flew out of his shop before I had a chance to buy them.
Then I saw a piece of Laguna Agate I just had to have. Instead of waiting and debating with myself over whether I really needed it or not, I jumped on it. When it came in the mail I was so excited! The color of the stone was so much better than it was in the pictures. The shape was perfect. It even had a little bit of exposed Druzy crystals in the center, giving that spot an unexpected sheen.
Click on image to see more pictures of this necklace.
I wrapped this one with a simple netted bezel, so as not to cover too much of the stones personality. Then I combined it with Rose Quartz and Plum Aventurine to accent the colors in the stone. This necklace turned out so beautifully I decided I had to buy more cabs from Micheal.
My next purchase was Yellow Crazy Lace Agate. I've seen so many crazy lace agate beads that were dyed to add color to parts of the stone. Most of them leave something to be desired. So when I saw this one, with it's beautifully natural (yes, natural, not dyed) shades of yellow and cream, I knew exactly what to do with it.
Click on image to see more pictures of this necklace.
I set this one in a simple coiled basket weave bezel and hung it on a strand of Aragonite and tiny silver beads, with a handmade toggle clasp to match the bezel. It turned out so beautiful I'm almost hoping it doesn't sell. (I want it!)
I still have three more stones from GemCutter's shop. A wonderful purple Mexican Lace Agate, a gorgeous Mozarkite cab, and a stunning Porcelain Jasper teardrop shaped cab. I can't wait to get to work on those. I hope they turn out as well as the other two did. *s*
Tuesday, November 25, 2008
Black Friday Weekend Sale!
I just wanted to let everyone know that I am having a great Black Friday Weekend Sale!
I will be offering 20% Off all items in my Stocking Stuffers section and 50% Off Everything Else.
Clearance items are included in sale.
http://gailavira.etsy.com
After midnight EST Cyber Monday, my shop will revert back to the "theme of the week" half off sale running now till New Year's Day.
Must put "happy holidays" in notes to seller to receive discount.
You have 3 ways to get your discount:
Purchase and pay as usual and I will refund the difference.
OR
Purchase and wait for a revised invoice before paying.
OR
Send me a convo stating which items you want and I will create a reserved listing just for you.
Discounts do not apply to shipping fees.
Friday, November 21, 2008
Ahhh.... I finally got my fix!
You know how it is when you run out of your last little bit of wire, right? You get cold sweats, anxiety attacks, then the nausea sets in, and the aches and pains, and.....
Well, ok, it's not really that bad. But it is pretty hard on you when you are used to being able to work on a project any time you want to, then you realize you're out of what you need for that project.
I just went through three weeks without any wire at all. Usually I don't let that happen. Things had just been so crazy here for a while that I didn't get a chance to order it. It was absolute agony!
I have to wonder though, did going without wire for so long really hurt me as much as it felt like it did. When you consider what I was inspired to do after not working on anything for those weeks, I'd say it did me a lot of good.

Tempest
It took me a total of 11 hours to make this necklace. All the findings, including the toggle clasp and the coiled spacer beads, were made completely by hand. If you would like to see more pictures of this necklace, you can find this item in my Etsy shop, http://gailavira.etsy.com.
Well, ok, it's not really that bad. But it is pretty hard on you when you are used to being able to work on a project any time you want to, then you realize you're out of what you need for that project.
I just went through three weeks without any wire at all. Usually I don't let that happen. Things had just been so crazy here for a while that I didn't get a chance to order it. It was absolute agony!
I have to wonder though, did going without wire for so long really hurt me as much as it felt like it did. When you consider what I was inspired to do after not working on anything for those weeks, I'd say it did me a lot of good.
Tempest
It took me a total of 11 hours to make this necklace. All the findings, including the toggle clasp and the coiled spacer beads, were made completely by hand. If you would like to see more pictures of this necklace, you can find this item in my Etsy shop, http://gailavira.etsy.com.
Friday, November 7, 2008
New Tutorial! Woven Front Pendant


Available in my Tutorial Shop on Etsy!
This tutorial teaches you how to make a simple, but very attractive pendant with a woven front. Once you learn the basic technique, there is no end to the ways you can customize this pendant.
Skill Level:
Intermediate
Materials needed:
*1 35mm x 25mm rectangle bead
*2 3½” pieces of 20g round wire
*1 7½” 20g round wire
*8’ 28g round dead soft wire
Tools needed:
*Flush cutter
*Round nose pliers
*Flat nose pliers
*Needle file or wire rounder
© Donna Spadafore, Gailavira Jewelry
You may use this tutorial to make jewelry for sale. If you do so, please link back to Gailavira Jewelry ( http://www.gailavira.com or http://gailavira.blogspot.com ) in the item description.
Click here to go to my Tutorial Shop on Etsy!
Tuesday, November 4, 2008
Just a Quick Update...
Right now I'm trying to get my store stocked up again for the holidays. I have lots of great items in there, but with the economy the way it is right now, I want to start offering some less expensive pieces again too. I'm not one of those snobs that thinks all jewelry worth buying has to cost an arm and a leg. *s*
I'm also having sales every week between now and New Years. Each week, for the whole week, a different type of item will be 50% off. Last week was all copper jewelry. This week is all pink jewelry. Each week, to find the sale items, just do a search in the form at the top of the home page of my etsy shop (http://gailavira.etsy.com) for the keyword given in my shop announcement. Everything that comes up on the search will be sold at half the listed price. Just follow the directions in my shop announcement to receive your discount.
I'm also busy coming up with new designs for tutorials. I've done three new ones over the past week and a half (see my tutorial shop, http://gailaviratutorials.etsy.com, to see all my newest tutorials). Also, if you see something in my jewelry shop that you would like to learn how to make, don't hesitate to ask for a tutorial. I love to do tutorials by request. If it is one of my own designs, I will do my best to get a tutorial out for it. If it isn't one of my own designs, I'll let you know where you can find a tutorial by someone else for that design.
Hope everyone has a great holiday season!
Friday, October 31, 2008
New Tutorial! 2 in 1 Filigree Style Bracelet


Available in my Tutorial Shop on Etsy!
This tutorial teaches you how to make a filigree style bracelet using wire wrapped cold connections.
Included in this lesson is a way to modify the basic bracelet to include a frame to support a large focal bead or cabochon. This portion of the tutorial only includes instructions for the frame. You will need to decide what method to use to attach the stone to the frame. In the second picture, the bracelet on the left side was made using techniques taught in the Dance Around the Sun tutorial. The bracelet on the right was made with a netted bezel.
Skill level:
Advanced
Material List:
* 7 2” pieces of 16g round wire
* 2 7” pieces of 16g round wire
* 32’ 26g round wire
* 2 3½” pieces of 16g round wire (optional)
* Round focal stone (optional)
Tool List:
* Flush cutter
* Round nose pliers
* Flat nose pliers
* Needle file or wire rounder
* Bracelet Mandrel
© Donna Spadafore, Gailavira Jewelry
You may use this tutorial to make jewelry for sale. If you do so, please link back to Gailavira Jewelry ( http://www.gailavira.com or http://gailavira.blogspot.com ) in the item description.
Click here to go to my Tutorial Shop on Etsy!
Monday, October 27, 2008
Crinkled Rosette Ring Tutorial

Available in my Tutorial Shop on Etsy!
This tutorial teaches you to make a cute little ring with a crinkle edged rosette out of woven wire.
Skill Level:
intermediate
Cost:
$6.00
Materials needed:
• 1 4mm round bead
• 2 8” pieces of 20g round dead soft wire
• 9’ 28g round dead soft wire
Tools needed:
• Flush cutter
• Round nose pliers
• Flat nose pliers
• Needle file or wire rounder
• Ring Mandrel
© Donna Spadafore, Gailavira Jewelry
You may use this tutorial to make jewelry for sale. If you do so, please link back to Gailavira Jewelry ( http://www.gailavira.com or http://gailavira.blogspot.com ) in the item description.
Click here to go to my Tutorial Shop on Etsy!
If you would like to be notified when new tutorials are released, add Gailavira Jewelry to your MySpace Friends List. Bulletins are sent out for each new tutorial.
Http://www.myspace.com/gailavirajewelry
Tuesday, September 30, 2008
New Tutorial! Wide Bail Pendant

Available in the tutorials section of my Etsy shop!
This tutorial teaches you how to make an extra wide bail for a pendant. These are great for pendants you want to put onto thick necklace cords, ribbon, or even Viking knit chains.
Please keep in mind that when making the neck cord, you must put the pendant on before finishing off the second end of the cord. Otherwise the end of the cord may not fit through the pendant.
This tutorial uses a simple briolette bead to show you how to make the bail. However, this technique can be used on any pendant with a frame that has two wires coming together to make the bail.
Skill Level:
Easy
Cost:
$4.00
Material List:
10" of 20 gauge wire (dead soft or half hard)
Approximately 7’ 28 gauge dead soft wire
1 medium sized briolette bead
Tool List:
Wire Cutters
Flat Nose Pliers
Needle File or Wire Rounder
Mandrel or other round object approximately 1/8" (3.5mm) in diameter
© Donna Spadafore, Gailavira Jewelry
You may use this tutorial to make jewelry for sale. If you do so, please link back to Gailavira Jewelry ( http://www.gailavira.com or http://gailavira.blogspot.com ) in the item description.
Click here to go to the tutorials section of my Etsy shop!
If you would like to be notified when new tutorials are released, add Gailavira Jewelry to your MySpace Friends List. Bulletins are sent out for each new tutorial.
Http://www.myspace.com/gailavirajewelry
Saturday, September 27, 2008
New Tutorial! Beaded Wire Cross Pendant

Available here: http://www.gailavira.com/tutorials
(scroll to the bottom of the page for free tutorials)
This tutorial teaches you to make a beautifully simple beaded cross pendant. The finished sized of the cross will be approximately 1" wide and 2" long.
Tuesday, September 23, 2008
Two New Tutorials!
I actually released these two tutorials last week. Can you believe I forgot to post it in my blog?
Twisty -Woven Bangle Bracelet Tutorial

This tutorial teaches you to make a playfully fun and flirty bangle bracelet.
Rosebud Earrings

This tutorial teaches you how to make a simple, but very beautiful, pair of earrings.
They are called “Rosebud” earrings because, with the briolette beads, they look like upside down rosebuds.
Both tutorials are available in my Etsy Shop!
p.s. I've lowered the prices on all my tutorials!
This tutorial teaches you to make a playfully fun and flirty bangle bracelet.
This tutorial teaches you how to make a simple, but very beautiful, pair of earrings.
They are called “Rosebud” earrings because, with the briolette beads, they look like upside down rosebuds.
Both tutorials are available in my Etsy Shop!
p.s. I've lowered the prices on all my tutorials!
Friday, September 12, 2008
Please Excuse the Mess
Last spring I decided to start taking all my product photos on a black background with a purple rose. The pictures actually turned out great (really dramatic), but my sales dropped drastically. Of course, part of that drop is due to the season (summer is very slow for me anyway), but I'm sure another reason sales dropped is the photos. I have heard from several people lately that it is difficult to make out the details in the jewelry on such a dark background.
So, over the next week or two, I will be taking new photographs and updating all of my etsy listings. This means that while I am editing all my listings things will look a bit messy.
So, over the next week or two, I will be taking new photographs and updating all of my etsy listings. This means that while I am editing all my listings things will look a bit messy.
Monday, September 8, 2008
Supplies for Beginners
Since I have started selling tutorials I have received many e-mails asking me where to get supplies for suitable for making the items in my tutorials. It's great that so many people are wanting to learn to make wire jewelry now! However, for those just starting out, it can be difficult finding the right suppliers. These are a few of my favorite suppliers that I found when I first started making wire jewelry. Most of these places have very reasonable prices. Perfect for those of you who are just starting out, or who are doing this as a hobby.
Wire Suppliers
For craft wire, the best place I have found is http://www.widgetsupply.com. They carry 16, 20 and 26 guage wire in many colors. This wire is gret for learning on. It's inexpensive and easy to work with. JUst make sure you are getting the enameled copper wire (they also carry coated aluminum floral wire which does not work for jewelry).
For Silver Filled wire I used to go to http://www.thebeadfactory.com. Silver Filled wire is a tube of silver that has been filled with copper, then heat and pressure treated to create a stronger bond than that used for silver plated wire. It's a great way to get the look of sterling silver for a lot less and it lasts a lot longer than silver plate. This is what I used for all of my jewelry until I was making enough sales to be able to afford Sterling Silver wire on a permanent basis.
For Sterling Silver wire, I cannot say enough good things about http://www.monsterslayer.com. They carry great quality products at wonderful prices. Another good thing about them, is you can buy as much or as little wire as you need. They also carry Gold Filled wire.
For Brass and Copper http://www.monsterslayer.com has a great selection.
For Niobium (excellent for people with metal sensitivities), Titanium, Stainless Steel, and many other types of wire, I go to http://www.theringlord.com. They mostly cater to chainmaillers, so most of the wire is half hard or full hard. They do also carry dead soft craft wire in 19, 20, and 22 guage.
Tools
http://www.lottadisplays.com has pliers at very good prices. They aren't the best quality, but if you are not sure if this is something you want to keep doing, or if this is just a hobby, their economy priced pliers are a great way to go. I am actually still using some of the pliers I bought from here, and they've lasted quite a while.
http://www.monsterslayer.com has all kinds of tools in many different price ranges.
Beads
http://www.firemountaingems.com has a wide range of beads in all sorts and sizes. Their less expensive gemstone beads are not always uniform in size, but if you like the more organic looking pieces, like I do, they are perfect. They also have flat rate $5.00 shipping (for USA only) with a handling fee of $2.85.
There are also some great shops on Etsy that have lots of beads. I've often found excellent deals for really great stones there. One of my favorite Etsy sellers for beads is http://doubleddesign.etsy.com.
Another great Etsy shop for beads is http://thebeadyeye.etsy.com
Or you can click on the links below to go to a site wide search for each type of bead.
Gemstone Beads
Glass Beads
Metal Beads
Handmade Lampwork Beads
Thursday, September 4, 2008
Carry Me - Gemstone Point Cap Tutorial
I wanted a way to wrap gemstone point beads that didn't have the "been there, done that" feel to it. So, after playing around for a while I came up with this design.
The woven cap taught in this tutorial "carries" the stone in a beautiful, yet subtly graceful way.


As you can see from the last two photos, there are many ways to alter this tutorial to make your own, one of a kind, pendant.
This tutorial is available in the tutorials section of my Etsy shop.
The woven cap taught in this tutorial "carries" the stone in a beautiful, yet subtly graceful way.


As you can see from the last two photos, there are many ways to alter this tutorial to make your own, one of a kind, pendant.
This tutorial is available in the tutorials section of my Etsy shop.
Sunday, August 17, 2008
Brand New Tutorial! Sensu - Adjustable Wire Ring Tutorial
Adjustable Ring Tutorial

Click here for more information
Wednesday, August 13, 2008
What I've Been Working On...
It's been awhile since I put out a new tutorial. Well, it's not that I'm not working on any. I was planning on doing one for the pendant in this photo:

For more information, click on the photo.
I just need to get some more of those kind of beads before I can actually do the tutorial for it. I like to practice on a few items before actually putting together the tutorial. I did find some on Etsy yesterday for a really good price. Soon as they get here I'll get to work on that tutorial.
I'm also trying to come up with some new designs for rings and bracelets to do tutorials for. I think I came up with a pretty neat freeform woven ring last night. If I can duplicate it, or at least figure out how to get it close enough to the first one, I'll definitely do a tutorial for it. I'll try to get some pictures taken soon so I can put it up in my Deviant Art Gallery so you all can get a good look at it.
Of course, school is starting soon too. So for the next couple of weeks things are going to be pretty crazy. My daughter had been accepted to a school specifically for children with Asperger's Syndrome and ADHD. It would have been great for her, but since the school is out of our school district transportation is a big problem. Which means she has to go back to the same school she was in last year. I was looking forward to not having to do any serious school shopping this year, but now it looks like I have to jump in there at the last minute to get everything she'll need. Really not looking forward to dealing with the crowds of last minute shoppers. I hate crowds. But at least once school starts I'll have a lot more time to work on more jewelry and tutorials.
Friday, August 8, 2008
New Business Card Design!
I finally got around to designing a new business card. My old design just seemed a little outdated, and I wanted something to match my website a little better.

I also has some earring cards printed up to match the business cards.

I think this design matches my current jewelry style much better than my old ones. These aren't quite as boring either.

I also has some earring cards printed up to match the business cards.

I think this design matches my current jewelry style much better than my old ones. These aren't quite as boring either.
Tuesday, July 29, 2008
My Mother's Flower Garden
Over the last couple of years my mother has worked really hard to get her flowers just right. While I was hanging out at her house the other day I decided to try taking a few pictures of them just to see what kind of shots I could get. I was a bit surprised to see how well they turned out.
Eventually I will have all the larger versions of these up in my DeviantArt gallery (sylva.deviantart.com).
 | These are "Black Eyed Susans". I love the contrast between the center and the petals. |
 | This is a close up of one of the Black Eyed Susans. I couldn't resist getting this shot. |
 | Yellow Tiger Lilly. |
 | Purple Rose of Sharon. This is actually my favorite flower. |
 | My daughter had been wanting me to get a good picture of a bee for her for quite a while. When I saw one land on this Purple Cone Flower I figured it would be the perfect shot. It's hard to tell on such a small picture, but on the larger one on my computer it looks like the bee is actually looking right at the camera. |
 | Here's another one of the bee on the Purple Cone Flower. |
 | White Hibiscus. Another one of my favorites. Of course, that could be because it is in the same family as the Rose of Sharon. *s* |
 | I had originally taken a picture of the whole flower, but I was most drawn to the center of this Red Lilly, so I decided to crop it real close. I love the detail of the pollen in this one. |
 | Another shot of the white Hibiscus. |
Eventually I will have all the larger versions of these up in my DeviantArt gallery (sylva.deviantart.com).
Wednesday, July 23, 2008
The Heart of a Dancer
When I started on this necklace I had no idea in my head of what I wanted to work on. I began shaping the wire around the turquoise nuggets, then shaping more wire around that, and soon it looked like a heart. While I filled in the larger frame of the heart with tiny coral pebbles I began to think of people I knew a long time ago.

When I was younger, I used to dance. Every weekend I would be in the circle surrounded by people I cared about. Sometimes, I carried a fan in one hand with my shawl over my arm, and danced the traditional way. Other times, my shawl would be draped over my shoulders, like the wings of a butterfly, as I danced. And still, even when I did not have my regalia with me, I wore my shawl and danced anyway. As long as the drum played, I would dance. When I danced, my heart would fly.
So many years have passed since I was last able to dance. Through those years I have lost track of many of the people who surrounded me those days. The people who were as important to me as dancing was itself. The people who taught me so many things. People who knew that you cannot teach a child to live the right way without following the right path yourself. People who you knew that if they saw you stumble would not laugh turn their backs on you, but would give you their hand and help you up again. Never judging. Never hateful. Always there when you needed someone.
As this necklace took shape I began to wonder where everyone had gone to, so I looked up their names on the internet. Many of them, understandably, I could not find. Those I did find, I was only able to find because they are no longer with us.
As the years have gone by the old ones, the ones who taught so many of us what it is to really live, have slipped away, one by one. As I was reading their stories one thing remained clear. Their hearts always stayed strong.
This necklace is their story.
Saturday, July 19, 2008
Finally Finished! Glory Donut Wrap Tutorial
This has been my most requested tutorial to date, so I decided to push everything else aside and work on just this. After hours of writing, re-writing and re-writing again, taking photos and editing them to the very last detail, typing and formatting the pdf file, it is finally ready! It's available in the tutorial section of my Etsy shop.

It's been long and hard trying to figure out how to word this tutorial. Getting the pictures at just the right angles was even harder. But it was totally worth it. I had a lot of fun working on this one, and laughed at myself a LOT too! I'm hoping whatever I decide to do next is just as much fun.
~*~*~*~*~*~*~*~
http://www.gailavira.com
http://gailavira.etsy.com
http://gailavira.blogspot.com
http://sylva.deviantart.com
Friday, July 18, 2008
Tutorial Preview - Glory
So far, my Glory donut wrap has been the most requested tutorial. Well, it's almost ready. I spent all day today taking the pictures and editing them. Tomorrow I'll work on typing it all up and making the PDF file. I plan to have it up in my Etsy shop either tomorrow evening or Sunday morning. For those of you who don't know what I'm talking about, here's a little preview. *s*


Wednesday, July 9, 2008
Wire Woven Adjustable Rings - NEW Tutorial!
I released another tutorial a few days ago, but forgot all about posting it here in my blog. It's a simplified variation of the adjustable rings I sell in my shop. I do plan on doing another tutorial for the more advanced adjustable rings later on, but I felt this was a better one to start on.

Wire Woven Adjustable Rings Tutorial
It's a great tutorial for beginners as well as more advanced wire workers. The tutorial shows a simple ring, however there is no end to the number of ways you can alter the technique to allow for your imagination to create many wonderful designs.
What's next? I have received many requests for a tutorial for the "Glory" donut wrap (pictured below). I plan to have that one out within a couple of weeks.

Glory - Rhodonite and Sterling Silver Pendant
As always I am open to requests. If you see something on my website or in my etsy shop that you would like to learn how to do, let me know. As long as it is not a technique I learned from someone else I will be more than happy to do a tutorial for it.
Wire Woven Adjustable Rings Tutorial
It's a great tutorial for beginners as well as more advanced wire workers. The tutorial shows a simple ring, however there is no end to the number of ways you can alter the technique to allow for your imagination to create many wonderful designs.
What's next? I have received many requests for a tutorial for the "Glory" donut wrap (pictured below). I plan to have that one out within a couple of weeks.
Glory - Rhodonite and Sterling Silver Pendant
As always I am open to requests. If you see something on my website or in my etsy shop that you would like to learn how to do, let me know. As long as it is not a technique I learned from someone else I will be more than happy to do a tutorial for it.
Friday, June 27, 2008
Mystic Moons

Swirling coils of sterling silver wire surround a mystical stone, trapped in a netted silver bezel. The stone, Luna Agate, has that appearance of many moons swimming in a purple sky.
The stone used for this pendant was cut and polished by Ed, from http://stonesinmotion.etsy.com.
I wanted to keep the wirework simple on this one. Ed did such a wonderful job on this stone I didn't want anything to overshadow it.
This pendant is available in my Etsy Shop.
Friday, June 20, 2008
One of my Etsy Friends: DoubleDDesign
Normally I don't feature other artists on my blog, but I have become such good friends with another artist that I just couldn't help wanting to show off her stuff and help her out.


We first met when I bought a couple of packs of loose stones from her about a year ago. I didn't realize she was having a sale, so I went ahead and paid her full price. A few minutes later I received a note from her saying that she had refunded part of my purchase price because of her sale. I was touched by her honesty because I have known many other artists who would not have made such a caring gesture.
After that we just went our own separate ways. Then a couple months later she contacted me again. She wanted some custom pendants made as gifts for her friends and family.
Through that sale we became good friends. I have since learned that she is a caring person, both in business and her personal life. I believe that when a person is good, it comes through in their work. It certainly comes through in Michelle's work.
Her shop on Etsy, DoubleDDesign, is filled with wonderful works of art. Her jewelry is both subtle and bold. Each piece seems to tell a story. Her attention to detail, even on the smallest pair of earrings, is a testament to the wonderful person that she is.
Thursday, June 19, 2008
Blog Spammers
Recently I have had a lot of spam comments left on my blog posts. I do my best to delete them as soon as possible, but to be honest, I hate having to do that.
I just want to take a moment to remind people who are rude enough to spam other people's blogs that it is not a good way to advertise your products/business. All it does is clutter up people's comment areas. It's aggravating to the person whose blog you are posting on, and it is annoying to the other people who are reading comments that actually pertain to the blog post. Annoying people will not attract customers to your business. It drives people away!
I love it when people make a comment that relates in some way to the content of the blog they are commenting on. Even if it's just a couple words to say they understand, or they agree/disagree with something that was said in the post. But to do nothing more than post a link to some other site after an extremely generic comment is unacceptable.
I don't like having to turn on comment moderation. To me, it makes it seem like I don't trust my readers. However, because of the few people who have been spamming my blog lately, I'm turning it on anyway.
Tuesday, June 17, 2008
Ammonite Wrap Pendant


This is just something I've been experimenting with. My daughter loves things shaped like ammonites, so I thought she'd like a pendant like this. I've got the front to where it looks decent, but I'm still having a little trouble with the back (last photo). I'm not so sure I'll be able to get the back to look the same as the front, but I'm going to keep trying a few more times anyway, I think.
Monday, June 16, 2008
Spiral Button Post Earring Tutorial
I have my third tutorial up in my Etsy shop.

This tutorial teaches you how to make a delightfully versatile post earring finding (instructions for the teardrop charm are included for those new to wire work).
This tutorial teaches you how to make a delightfully versatile post earring finding (instructions for the teardrop charm are included for those new to wire work).
Saturday, June 7, 2008
Ahh, Sweet Time... Alone!
Right now I am enjoying one of my rarest pleasures.
Time alone.
A chance to be all by myself and not have to deal with hearing the TV, kids nagging, screaming, running through the house. The phone ringing every five seconds.
I had forgotten how good it feels to wake up before the sunrise and just be alone. I used to do this all the time. I would wake up and immediately start working on my jewelry. For over a month now I haven't had any time to be alone and clear my head. My work has seriously suffered because of it. I haven't really been able to make anything new that was worth listing in my shop because of this. Hopefully that dry spell will be over soon.
For now though, I think I will just be content to drink a cup of tea and watch the cats sleep.
Friday, June 6, 2008
Tutorial #2 - The Caged Bird's Song - Wire Pendant
I finally finished my second tutorial.

Click on image
to go to tutorial.
The Caged Bird's Song has been one of my most popular pendants on DeviantArt.com. http://sylva.deviantart.com.
Because it has been so popular I have decided to make a tutorial teaching how to make this beautiful pendant. This tutorial features full color photos and clear step by step instructions, as well as a few extra tips.
This pendant works well with round beads. It is also an excellent way to cage irregularly shaped tumbled stones that have not been drilled.
I still have a few more tutorials I'm planning on releasing. As soon as I get them done they will be posted here. I am also open to requests. If there is something in one of my shops, or on my deviant art page that you are interested in learning how to make, just let me know and I'll see what I can do.
Next in line? Button post earrings that can be worn as they are or used as a base for other designs.
Have fun creating. *s*
Thursday, May 1, 2008
My First Tutorial
I've been meaning to do some wire work tutorials for a while but kept procrastinating. Now, I finally have my first one up. It's a simple one for a "Wrapped Mosaic Link" jewelry component. It's a versatile piece that is easily adapted for many different designs.

Click image for more information
I used this tutorial to create the earrings below. The bracelet focal was made using this tutorial as well, with a few modifications.


I think I procrastinated for so long because I was intimidated by the whole process of putting it together. Now that I have this first one done, the others I had in mind will be coming out soon too.
Click image for more information
I used this tutorial to create the earrings below. The bracelet focal was made using this tutorial as well, with a few modifications.
I think I procrastinated for so long because I was intimidated by the whole process of putting it together. Now that I have this first one done, the others I had in mind will be coming out soon too.
Tuesday, April 29, 2008
Tortured Innocence

Click on image for more details.
An innocent soul tormented by it's cage.
Whirling, twirling, metal swirling round and round.
Closer, closer, spinning closer.
Light is growing faint.
Hope disappears into the night.
Will the spinning ever stop?
Whirling copper coils surround a pink lepidolite stone.
I oxidized the copper with Liver of Sulfur.I didn't want the copper to turn black, so I left in for only a couple of seconds. Then I used a brass brush to clean up just a few small areas to highlight it. It gives this piece a polished look, while keeping the dark, ominous feeling, creating an interesting contrast with the pink stone.
Friday, April 25, 2008
Memories

Click on the image for more information.
I decided to go in another direction with this necklace. It's a little bigger and more involved than most of my other work.
An oxidized sterling silver frame filled with cloudy blue aquamarine nuggets, watermelon tourmaline and a sprinkling of tiny labradorite rondelles. The wrapped link chain is also studded with these beautiful beads. The beads used in this piece have a wonderful organic look and feel.
I named it "Memories" because it reminds me of a place we used to go when I was a child. While my family was still living in New York there was a park we would go to that was close to the ocean. My father and brother would skip rocks accross the water while my mother and I would sit on the swings. Near the fence to the park were some tiny colorful flowers. That park is one of the few things I remember from that time.
The focal piece for this necklace is 5 1/2" wide and 2" tall. Including the top edge of the focal, the necklace is 23" long. Because the top edge of the focal is a straight line, the necklace hangs a little bit higher than most necklaces of this length.
Click on the image to go to the listing for this piece in my etsy shop if you'd like to see more pictures.
There is also a pair of earrings to match this necklace. I made miniature copies of the focal for the necklace and suspended them from the handmade ear wires with simply coiled "hangers".

Click on the image for more information.
Monday, March 24, 2008
The Beauty of Imperfection
A while back I was looking at some beads to buy. There were two strands left of the same kind of beads. After inspecting them both for a while I took one of them and left the other one for someone else to buy.
When I went to pay for them the person running the booth asked me why I chose the beads with so many imperfections when both strands were the same price. I simply said, "Because I like them better".
You see, to me, a perfect stone is too easy. You don't really have to work very hard to make a perfect stone look good. Life isn't that easy, so why should art be that easy?
I like the little inclusions and blemishes in some stones. They remind me of all the people I've ever met. Some people try to hide their flaws. Taking great pains to make sure that one little bitty mark isn't noticeable. Sometimes they hide it by covering it up. Sometimes they simply turn their back on it. But it will always be there. It's part of them, it makes them who they are.
Some people simply ignore their flaws. They just pretend they don't exist. But they are still there for everyone else to see.
Better yet are the people who embrace those flaws. Those little imperfections that make most people cringe at the thought of the world seeing what is really there become the one thing that people love most about those with the courage to make their flaws their calling cards. To these people life isn't just a show. It's truly living.
When I buy stones for making jewelry I look for these flaws. I use those imperfections as much as I do the stone itself to create designs to reflect those of people and the way we use our flaws as part of who we are.
Thursday, January 3, 2008
Breaking out the sewing machine....
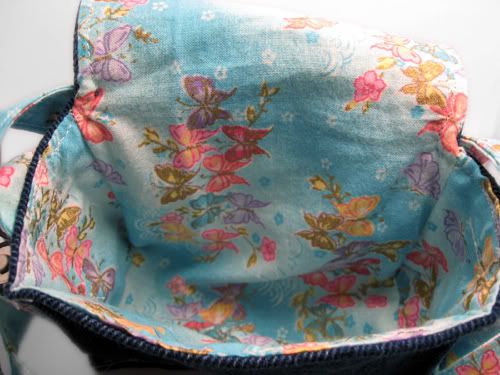
I got a new camera, so you know what that means, right?
Another reason to accessorize!
See, to me, any new "toy" is just another excuse to take out the sewing machine and make something to keep it in. And that's just what I did.

It's been awhile since I've done any serious sewing, so you can see from the pictures that I'm a little bit rusty. It's also my first try at a camera case.
I found the instructions here. It's a pretty easy pattern to follow. I just made a few adjustments to suit my purposes, and of course, the size of my camera.


The butterfly fabric does make it look a little juvenile, but it's cute, so I like it.
Subscribe to:
Posts (Atom)